Are you expecting to travel around Europe in 2024? In case you get an appointment for a Schengen visa appointment, it is important to reconfirm your documents to ensure that no journey plans go awry. In this article, we are going to explain how you can check your Schengen visa appointment and share tips for an impressive overall performance during the interview. Also included is a well-known name in visa assistance — SkyTravel Global.
Why It Is Important To Get A Confirmation For Your Schengen Visa Interview
Validating your Schengen visa appointment at the scheduled time is a requirement for most consulates. This ensures that your time is locked down and secured, preventing any last-minute differences or confusion. It also gives you the comfort of knowing your slot is saved, allowing you to prepare for travel with peace of mind.
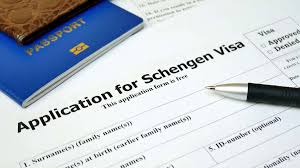
How to Check Schengen Visa Appointment
Step 1: Find a Confirmation Email
Within 2–3 days after you have booked an appointment for a Schengen visa appointment, the consulate or Visa Application Point will organize and confirm your appointment. In that email, you will find the details of your appointment, such as the scheduled date, time, and location. Please ensure you check this email thoroughly to verify all the information is correct.
Step 2: Log in to the Appointment Portal
For your Schengen visa appointment booking, after you have submitted your application and paid the fee, return online to where you first booked the appointment. You can verify the appointment details and make any necessary changes there. You will need to have your appointment reference number and login details ready, as this process can be very difficult without them.
Step 3: Connect with Visa Application Center
If you have not received the confirmation email or if some details do not match, contact the Visa Application Center directly. Provide them with your appointment reference number and any other relevant information. If you are a UK applicant, SkyTravel Global, one of the top Schengen visa agents near me, can check your appointment confirmation and address any concerns.
Step 4: Get Ready for Your Visit
After confirming your Schengen visa appointment, you should begin preparing all the relevant documents required for the application. Prepare everything, including your passport, application form, and supplementary documents specific to your visa type, well ahead of time. Being fully prepared will ensure a smooth process.
Additional Tips
- Review the Confirmation: Always review the confirmation email and appointment details on the portal to ensure all information is correct.
- Be Organized: Particularly on the day of your application, ensure all your documents are together and easy to access when asked.
- Get Help: If you are confused or uncertain about any step of the visa confirmation process, be sure to seek help from a professional and trustworthy company like SkyTravel Global.
Conclusion
Verifying your Schengen visa appointment is a basic yet crucial step in preparing for your trip. By following these steps, you can confirm your appointment and be fully prepared for your visa application. Do not worry—SkyTravel Global is here to ensure that your visa process goes through without any stress or hassle whatsoever.